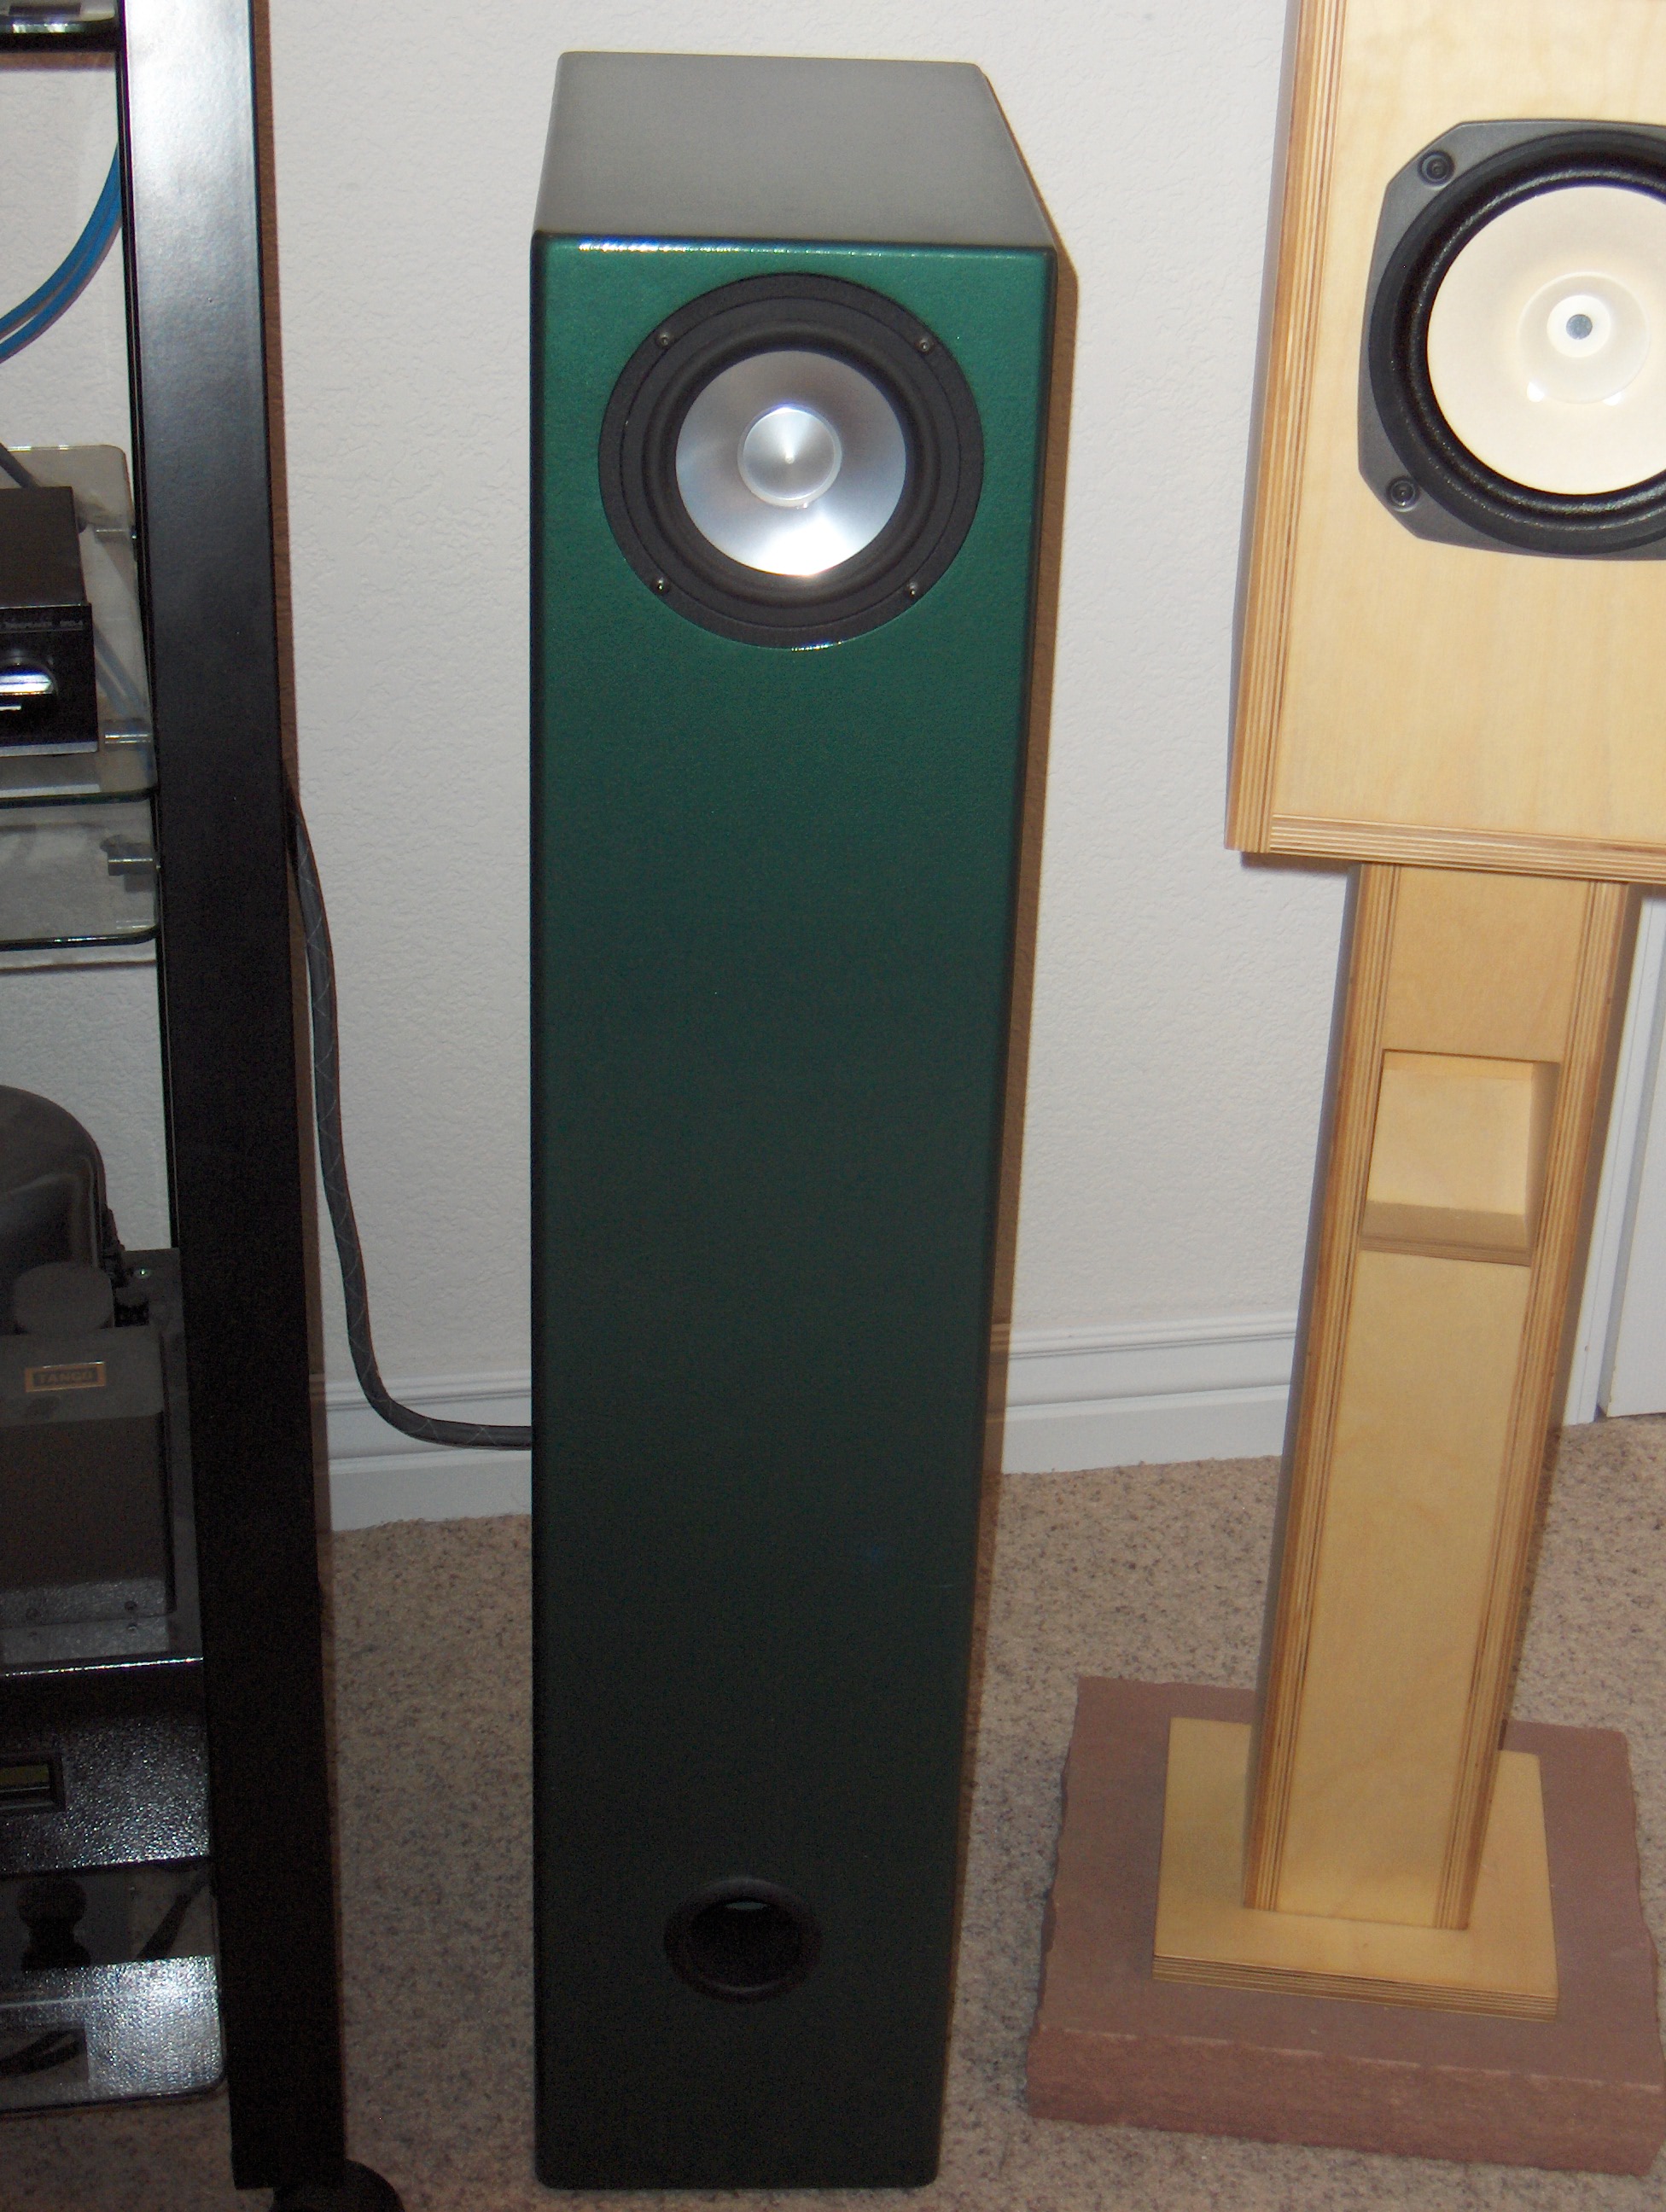
Jordan JX-92S MLTQWP speaker
My latest, and best speaker project: a single-driver Jordan JX-92S speaker in an MLTQWP (Mass Loaded Tuned Quarter-Wave Pipe) enclosure.
The Jordan JX-92S is a very special driver, unlike any other full range drivers I've played with. You can find the datasheet on the driver here. Though at 88dB/1W/1M it's not as efficient as many full range drivers, it is capable of producing substantial bass, in the right enclosure.
This driver is also the least directional full-range driver I've used. It really allows for a large "sweet spot", and moving your head a few inches doesn't mess up the sound like what happens with some full-range speakers.
To design the enclosure, I made use of Martin King's Mathcad models of transmission line speakers. Martin has done some incredible work modeling TL speakers, and I found it pretty easy to make trial-and-error adjustments with his model until I got the enclosure to do what I wanted.
The low-end response in this enclosure is quite admirable for a 4" driver: -3dB is modeled at around 35 Hz! Here's the estimated frequency response as calculated in the model:
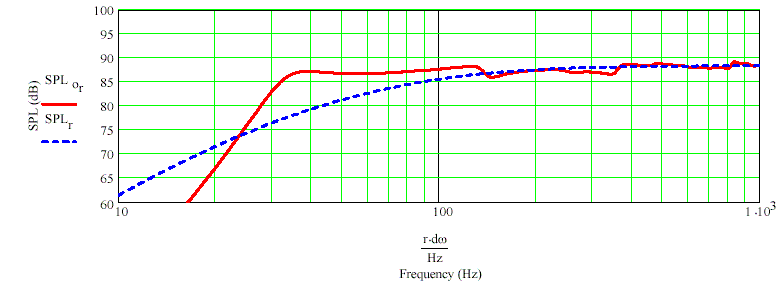
If you want to see the parameters I used in the Mathcad model, you can download a PDF of my spreadsheet. Since I used Mathcad explorer, a free version that doesn't allow you to save your work, I can't offer the file to you. Even if I did have the full version, the file really belongs to Martin King! I suggest if you're interested in modeling speakers that you visit his web site.
I really love the sound of this speaker. One of these days I'll get around to getting it into the chamber and measuring it. Or maybe not - it sounds so good that I'm afraid I'll be disappointed if it doesn't measure well. It has full bass that's very well controlled, a lively high end that's very non-directional, and sweet mids. I've had these guys running for about a year, and I'm always amazed when I turn them on after not listening for a while.
In any case, if you're looking for a fairly easy to build single-driver speaker, and have about 10 watts to drive it, I suggest you seriously consider this driver. There are other box designs around on the internet as well... I know Jordan has a few, and I'm sure there are others.
Speaking of amplifiers... I use this primarily with my single-ended KT88 E-linear amp, which does about 15 watts. It's a little marginal on my P-P 6B4G amps.
Building it - Updated - fixed dimensions!
The speaker is built mostly out of MDF, with a few parts fabricated from Baltic birch plywood. Nothing sacred about this, it just made sense to me, and matched the material I had in the garage!
Following are drawings. If you have AutoCAD (or another compatible CAD program), you can download the DWG file, or a DXF file, of this. It is drawn at full scale in the CAD files.
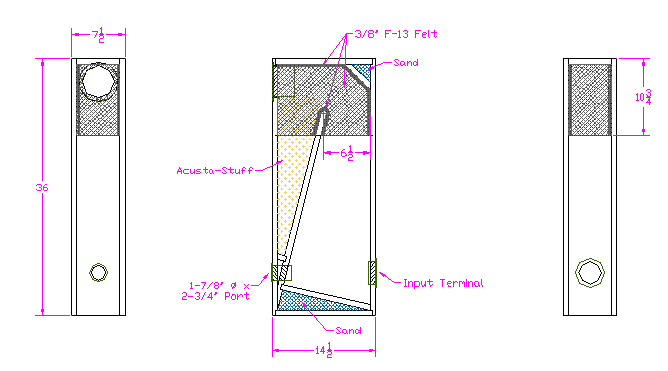
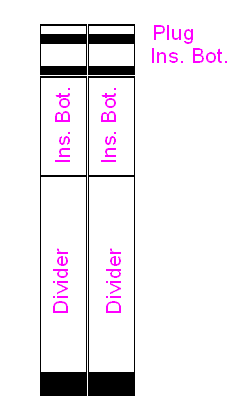
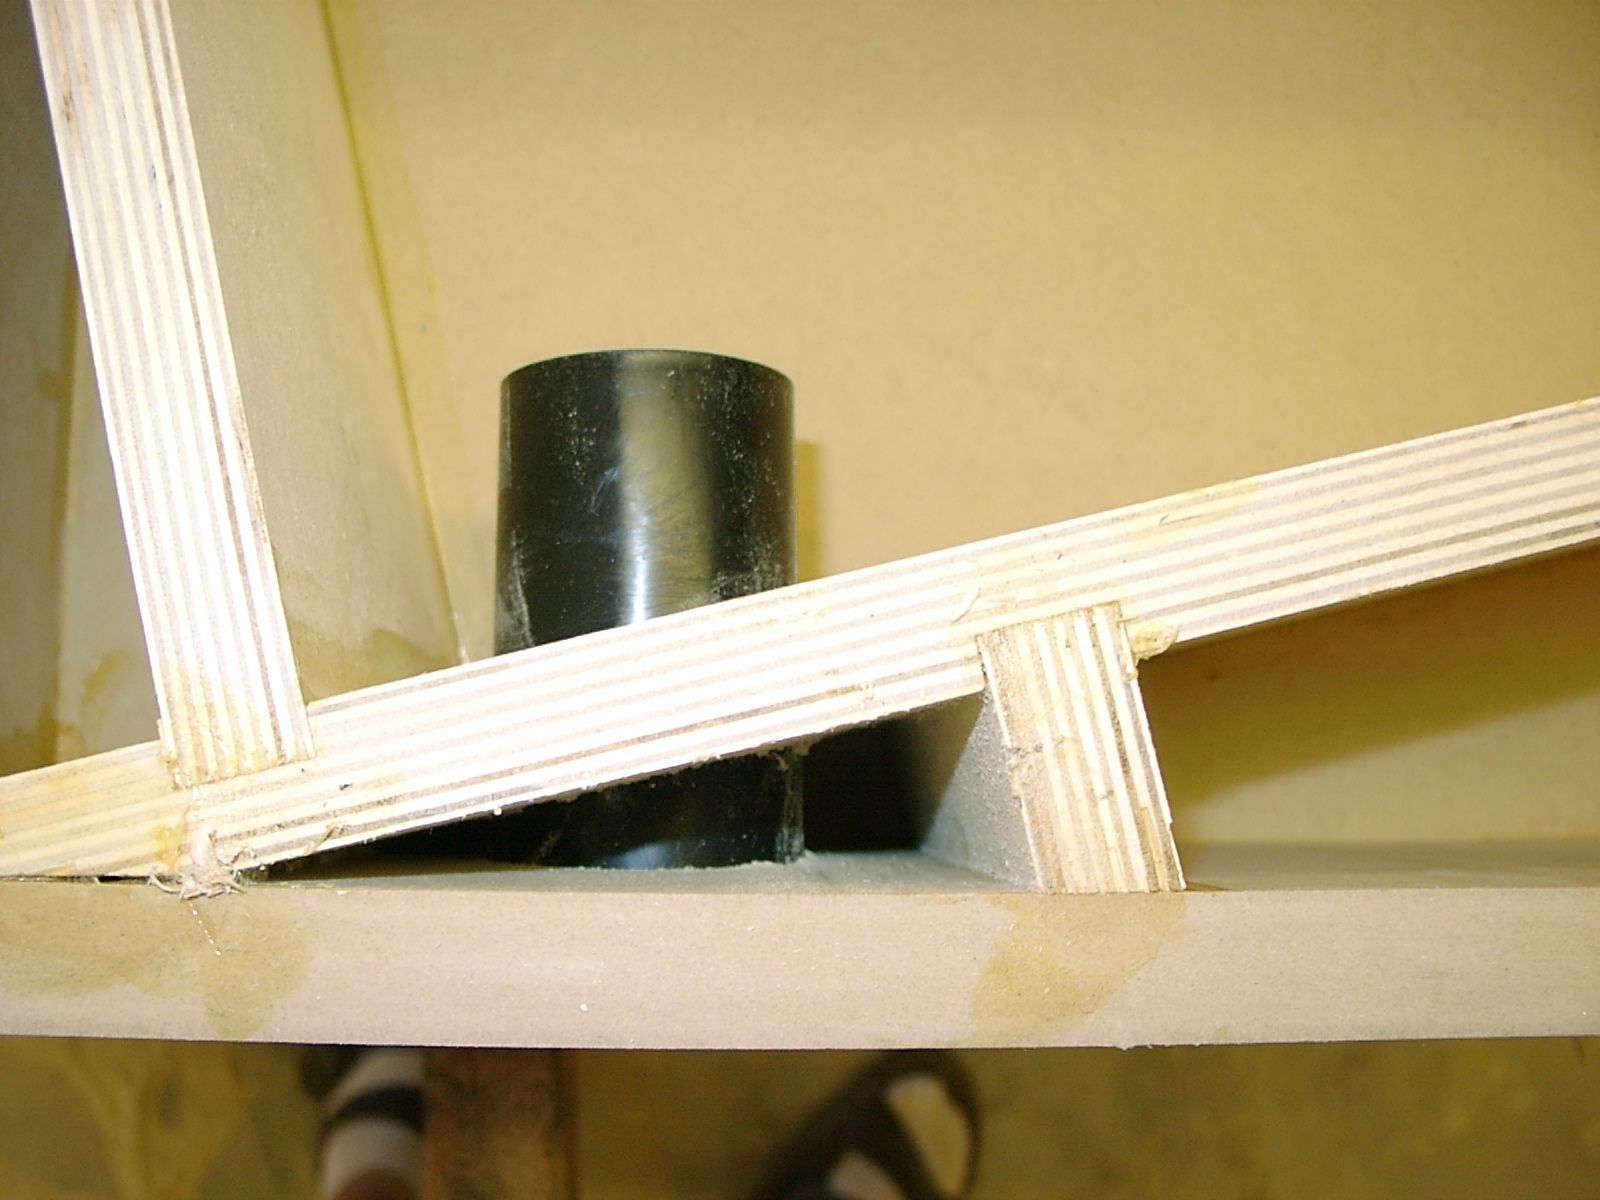
Note the felt, sand, and acousta-stuff. These are all very important, especially the stuffing. The port dimension is also pretty critical - small changes in the model made significant changes in the bass response.
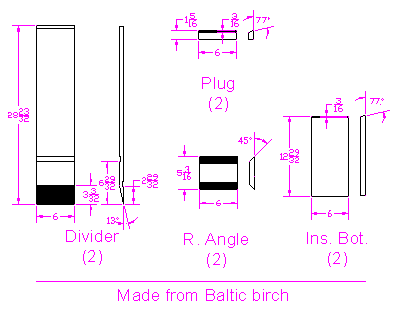
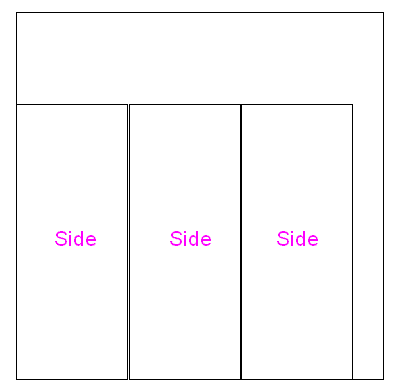
These parts are the ones that I made form Baltic birch, and how I laid them out on a piece of birch ply I had lefty over from another project. The angles are a little tricky to do; I made a jig and cut them on the table saw. Be careful! I'm not responsible for lost fingers!
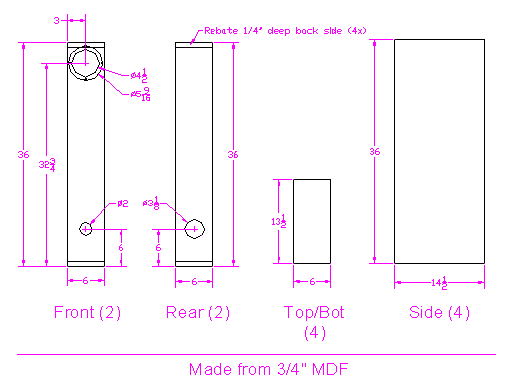
These parts I made from 3/4" MDF.
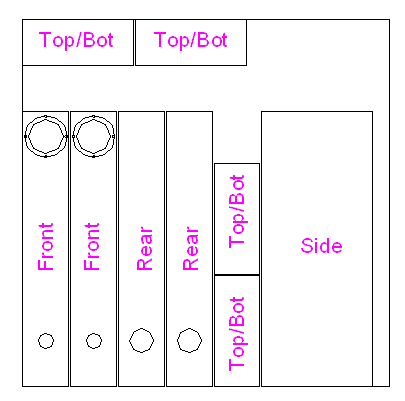
And this shows how the parts were cut from a single sheet of MDF. I had the store cut the sheet in half so I could handle it by myself on the table saw.
The following photos show some of the construction of the cabinets, more or less in order. Note photos are hyperlinked to full-size images.
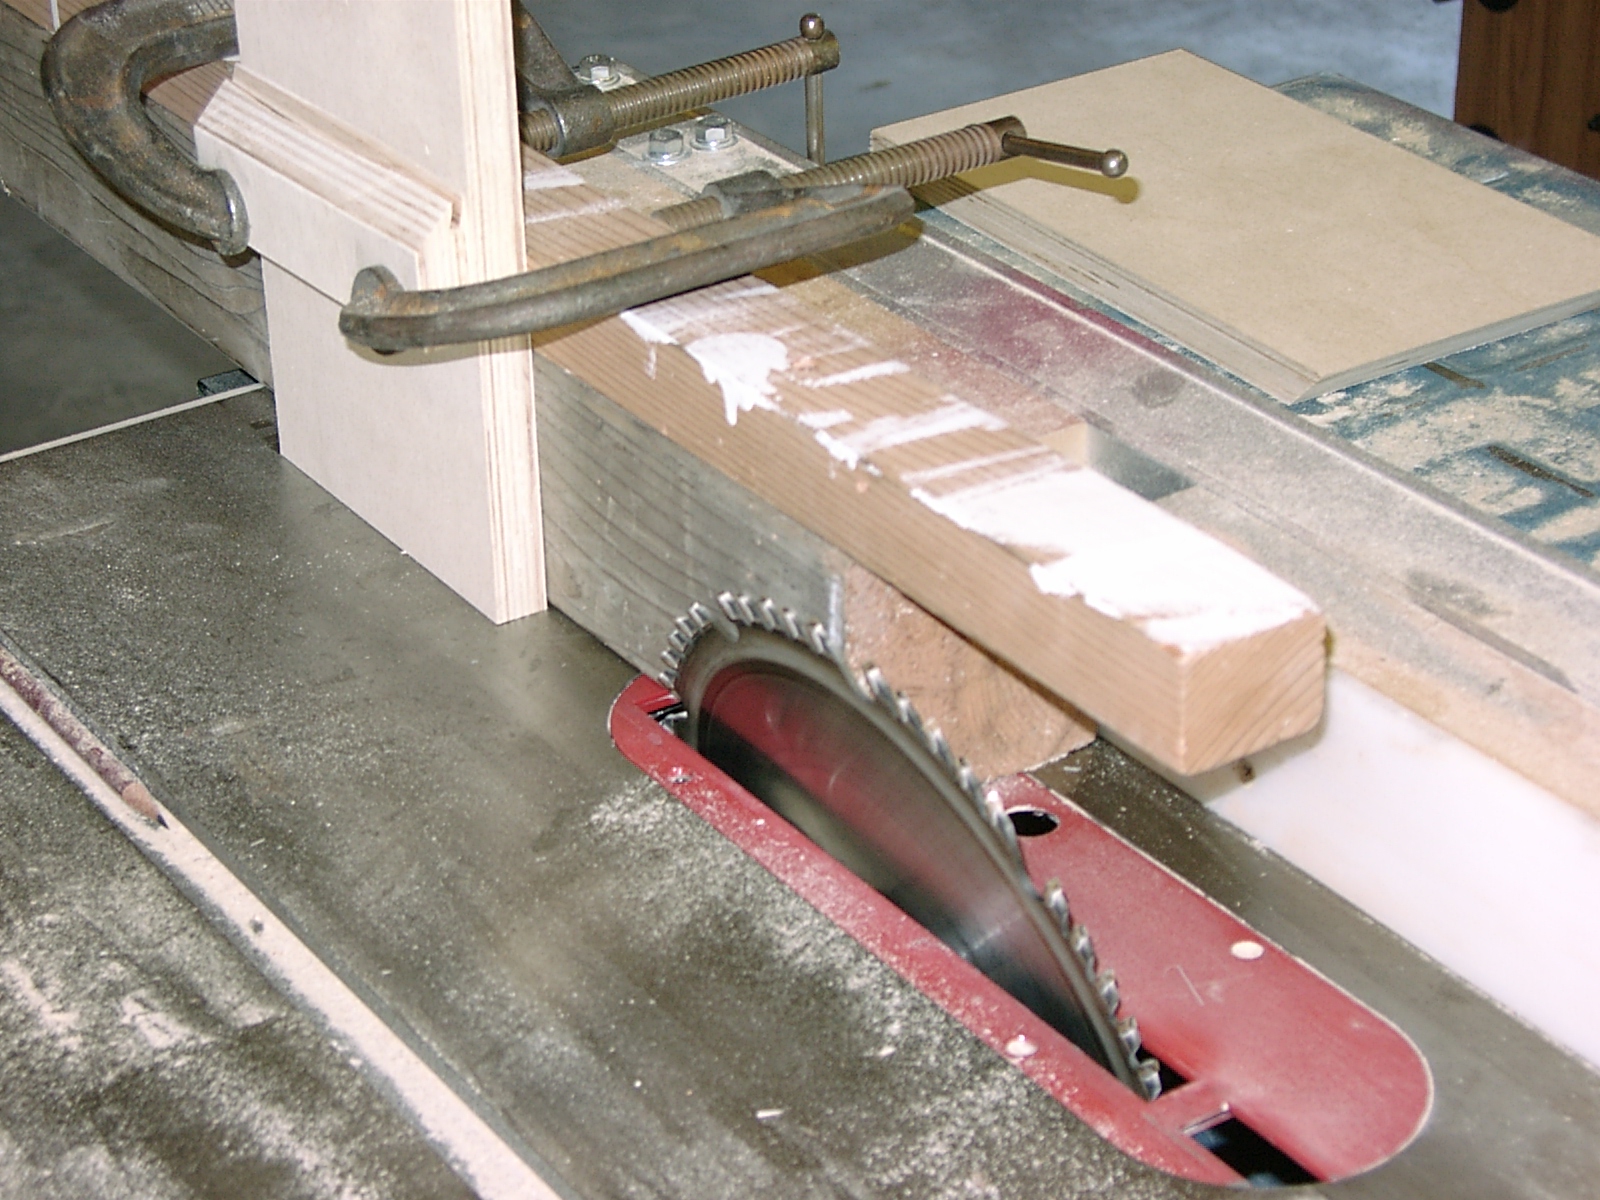
That angle cut I was talking about...
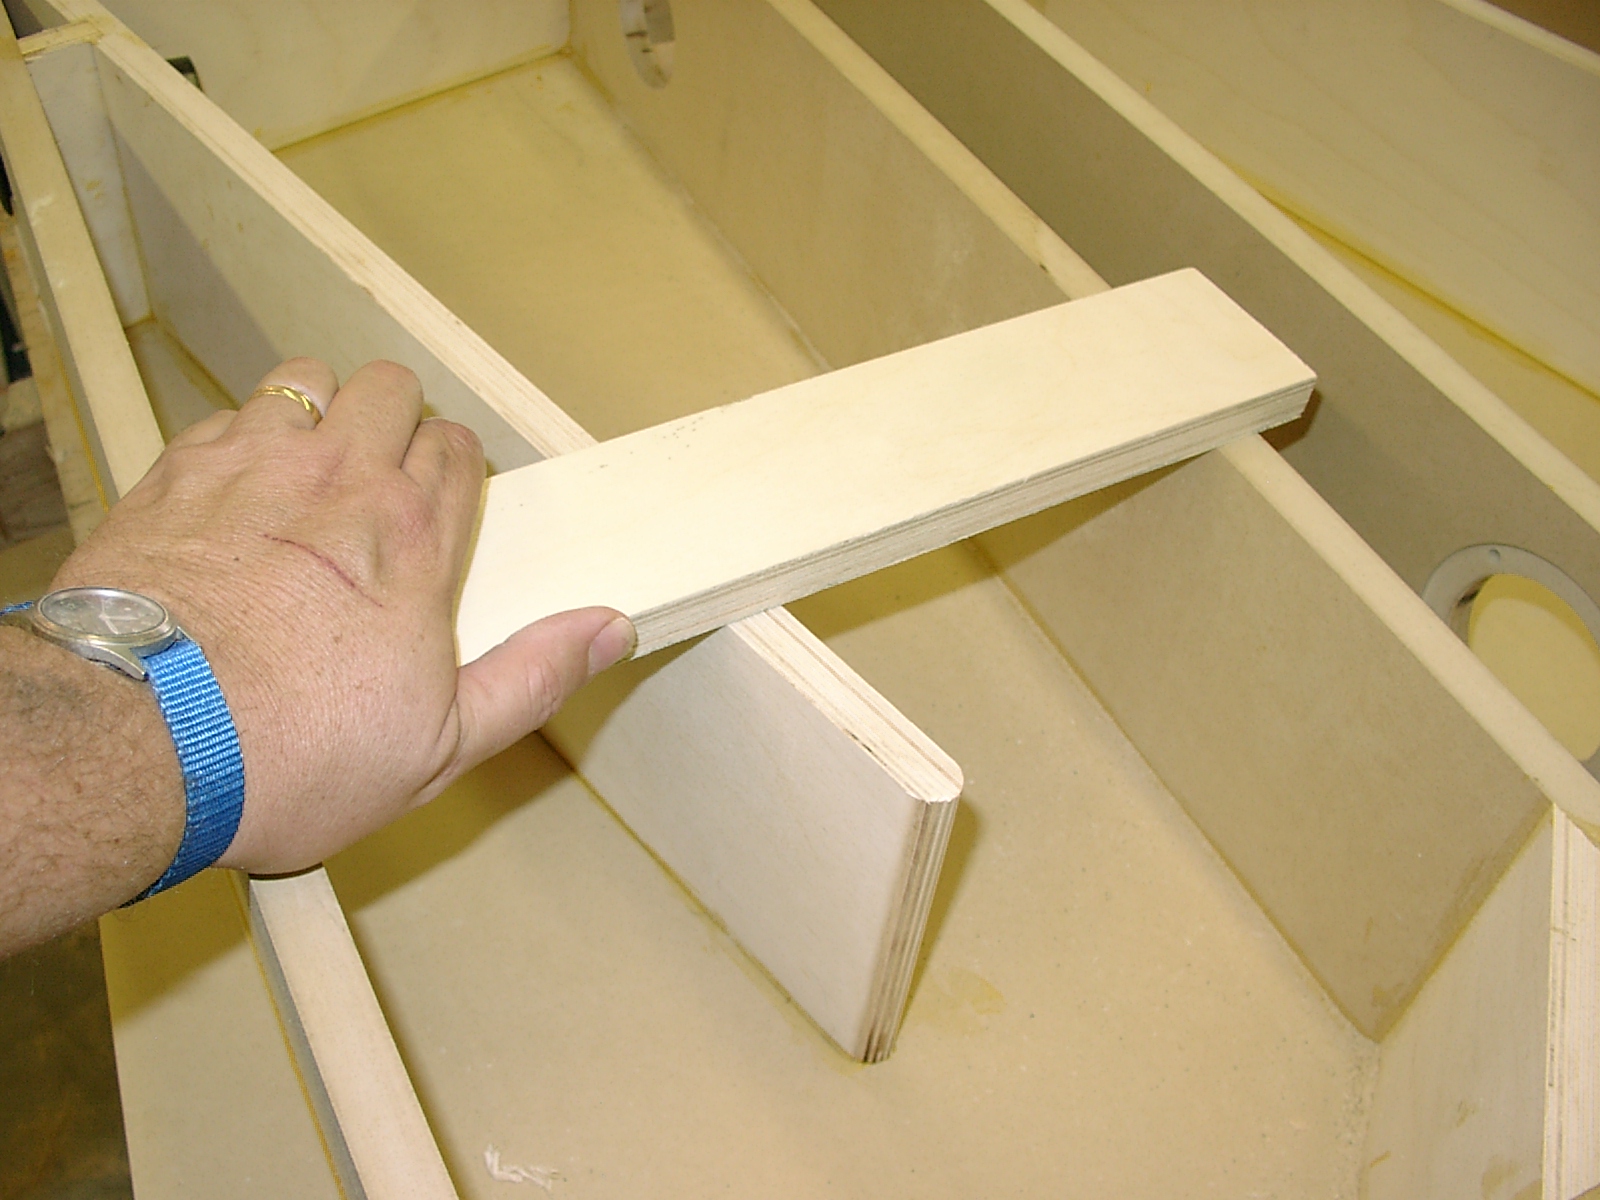
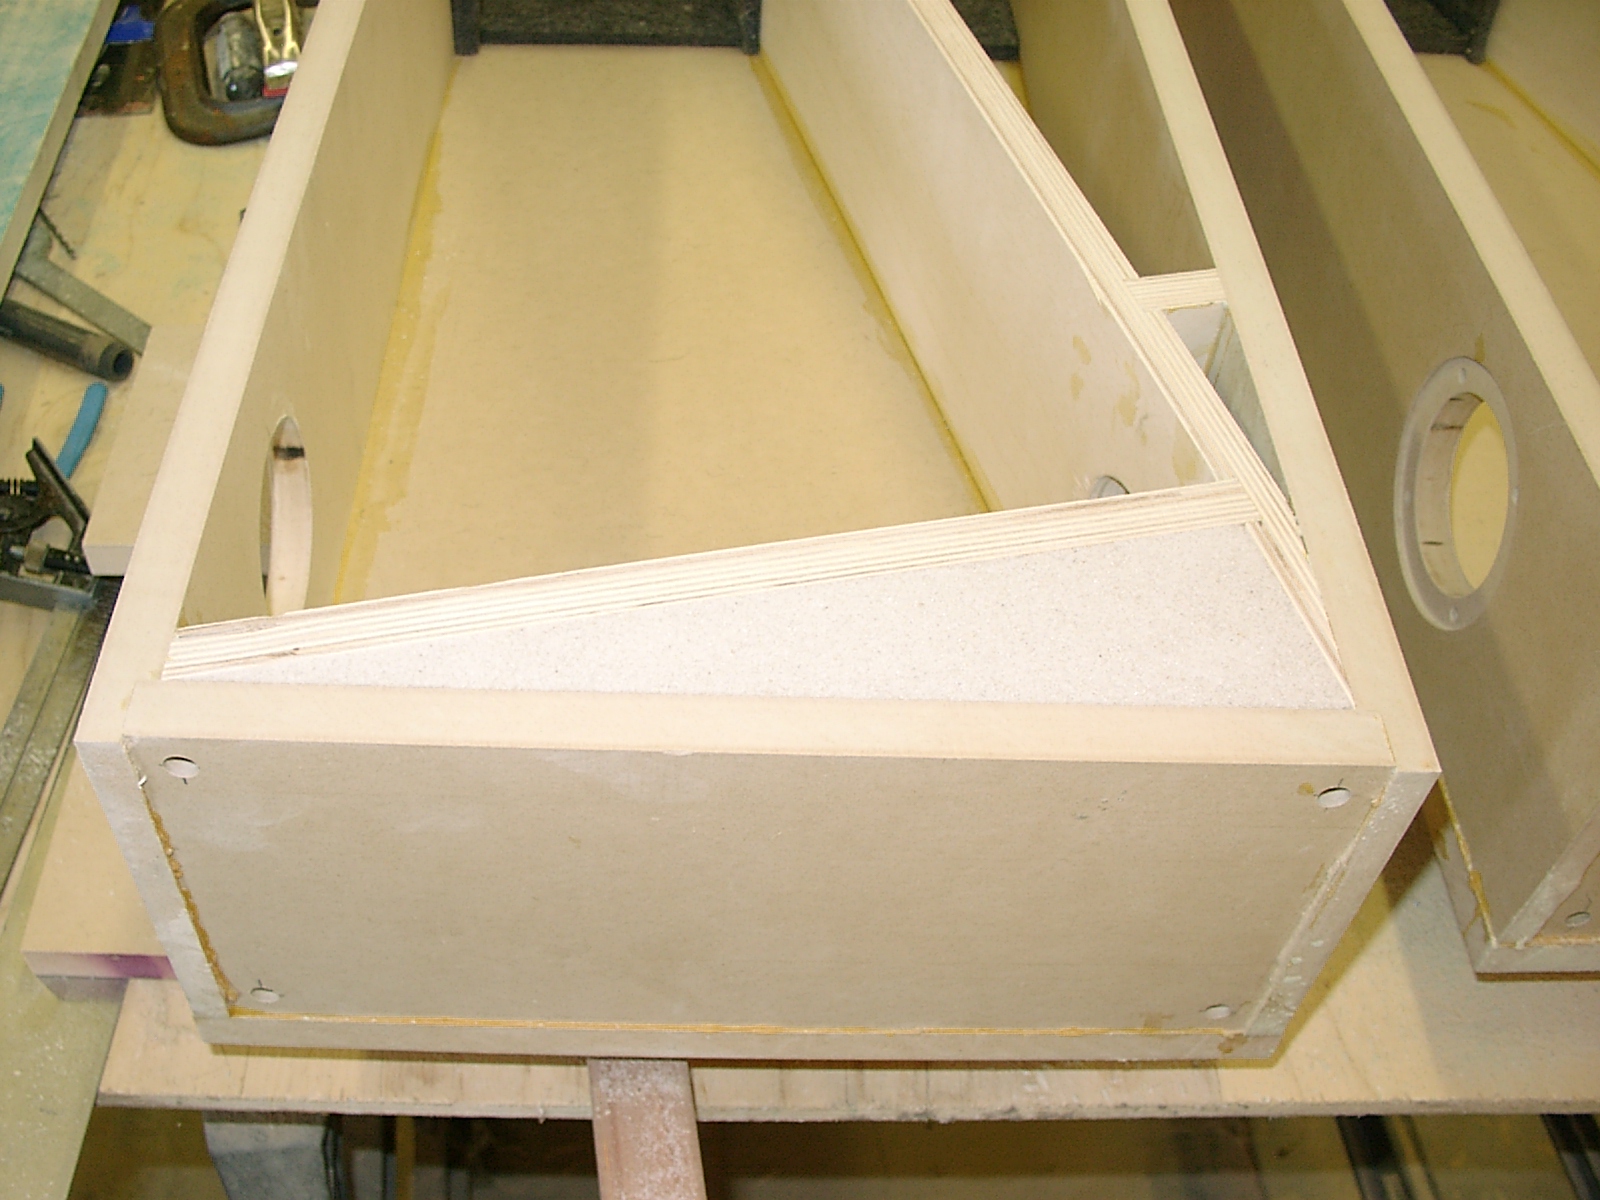
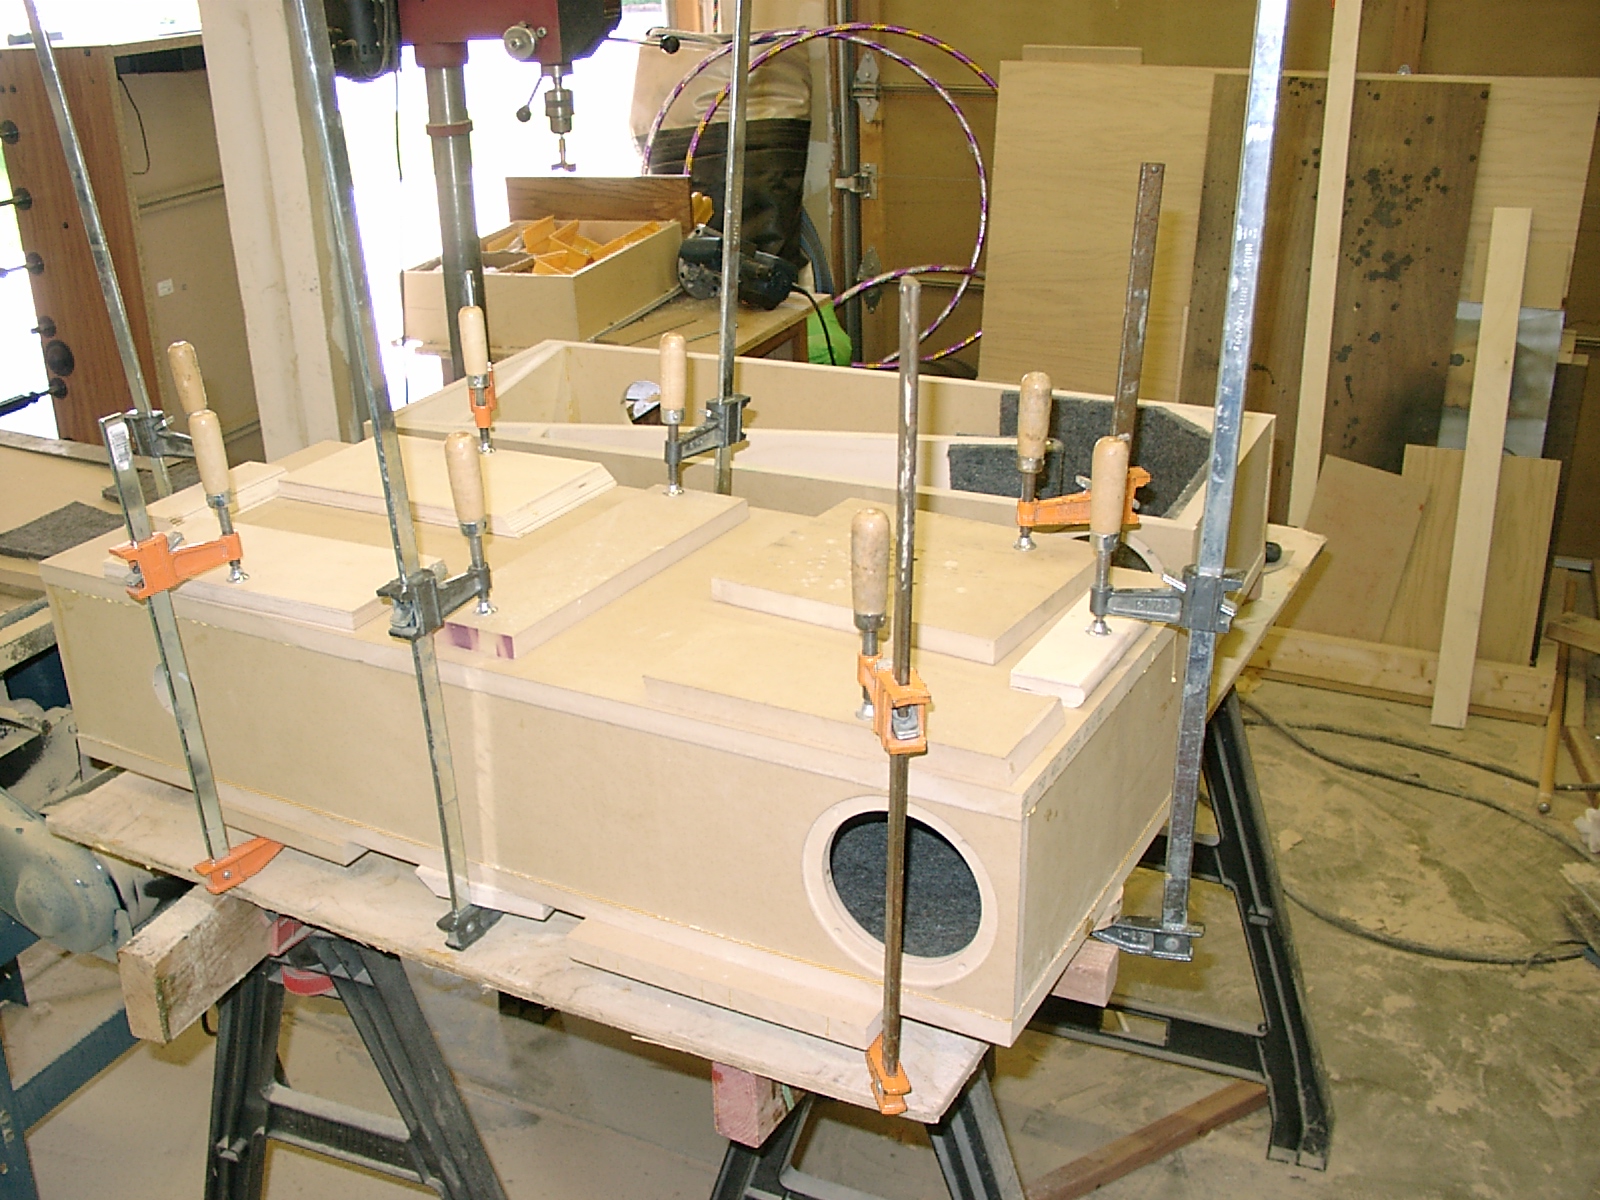
The first thing done after cutting all the pieces out is to make an open box out of the front, back, top, and bottom.
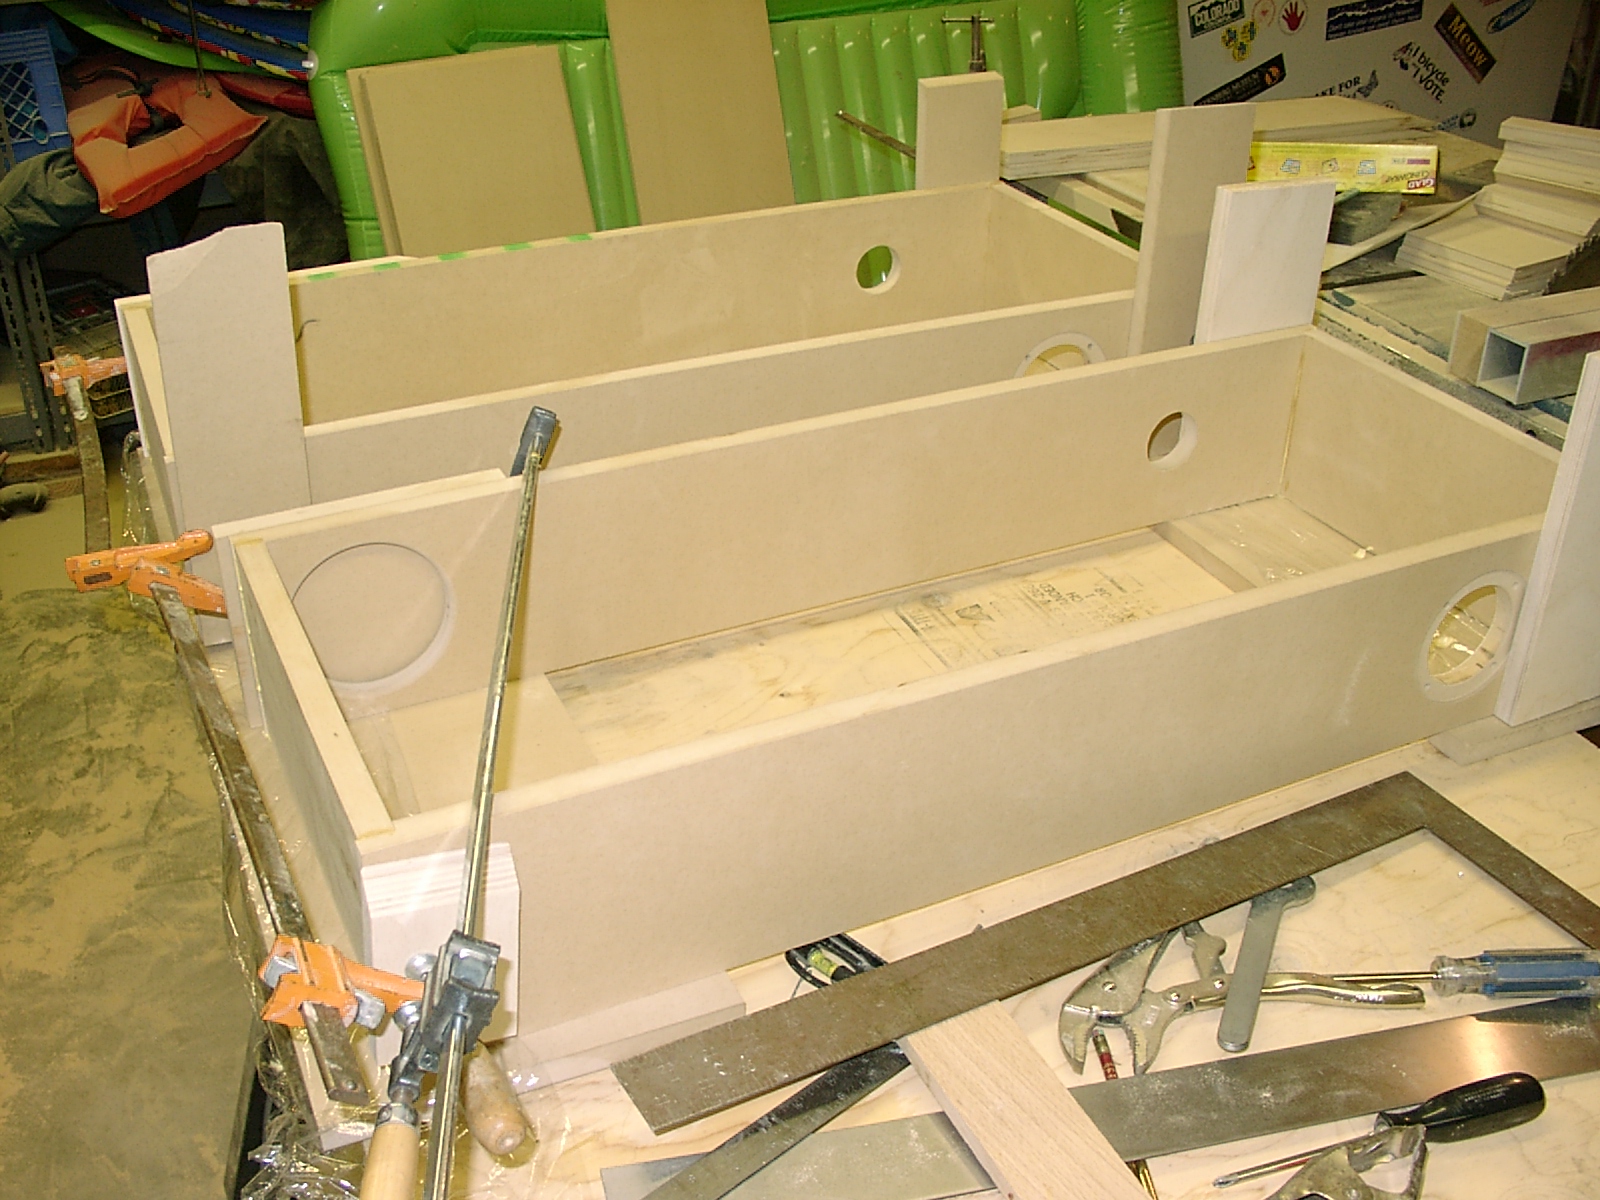
After these pieces are glued, you glue one side on. This is shown in the photo below.
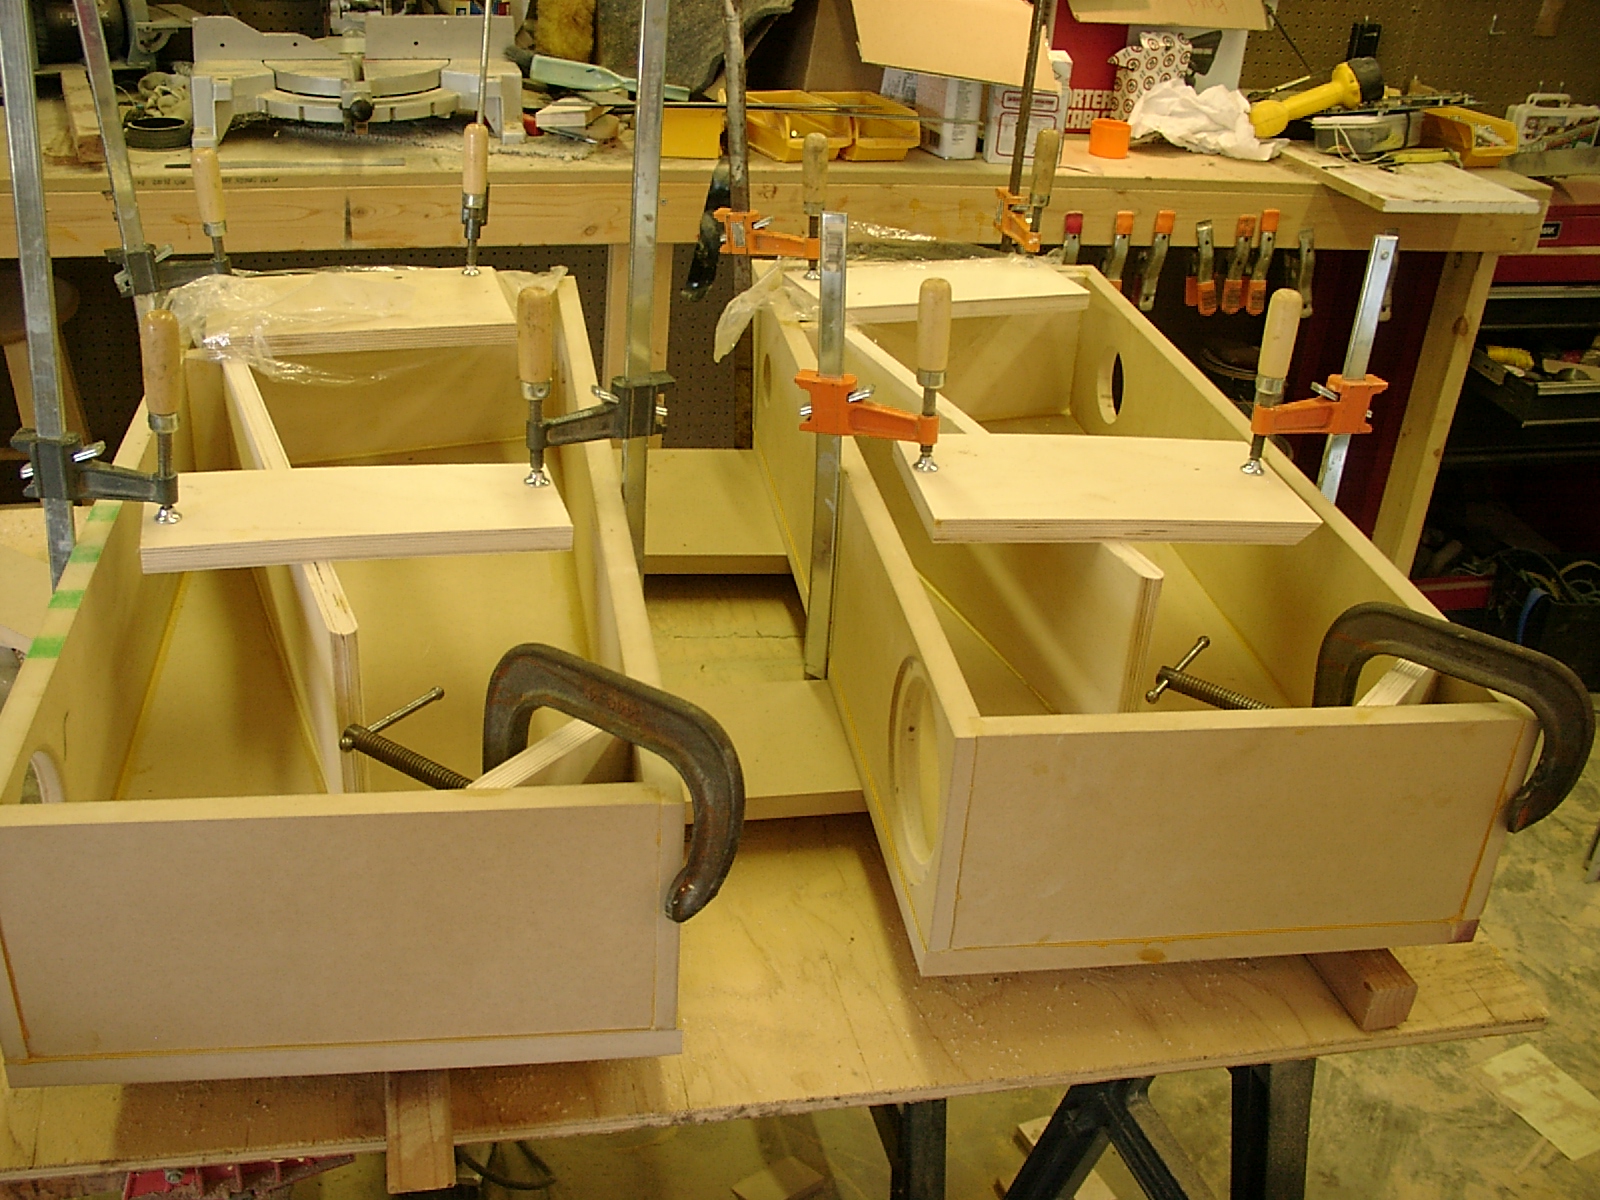
With one side in place, the inside parts are glued in.
Several things have to happen before you glue on the other side. First, you have to sand the sides and internal pieces so that they are absolutely flat (in one plane), so you get a good airtight glue joint between the side and everything else. I did this by making a "longboard", using a scrap of birch ply and some self-adhesive auto-body sandpaper:
The longboard is used to fair the surfaces so the side will touch all the other parts with no air gap.
Another thing you need to do at this stage is drill the hole for the port. Because of the funky angle of the internal baffle, I found it easiest to do this with the box mostly assembled. Using a 2" drill bit, I clamped the whole speaker box on the drill press. This was tricky - you might need help holding this while you drill. You need to drill through the front AND through the angled baffle.
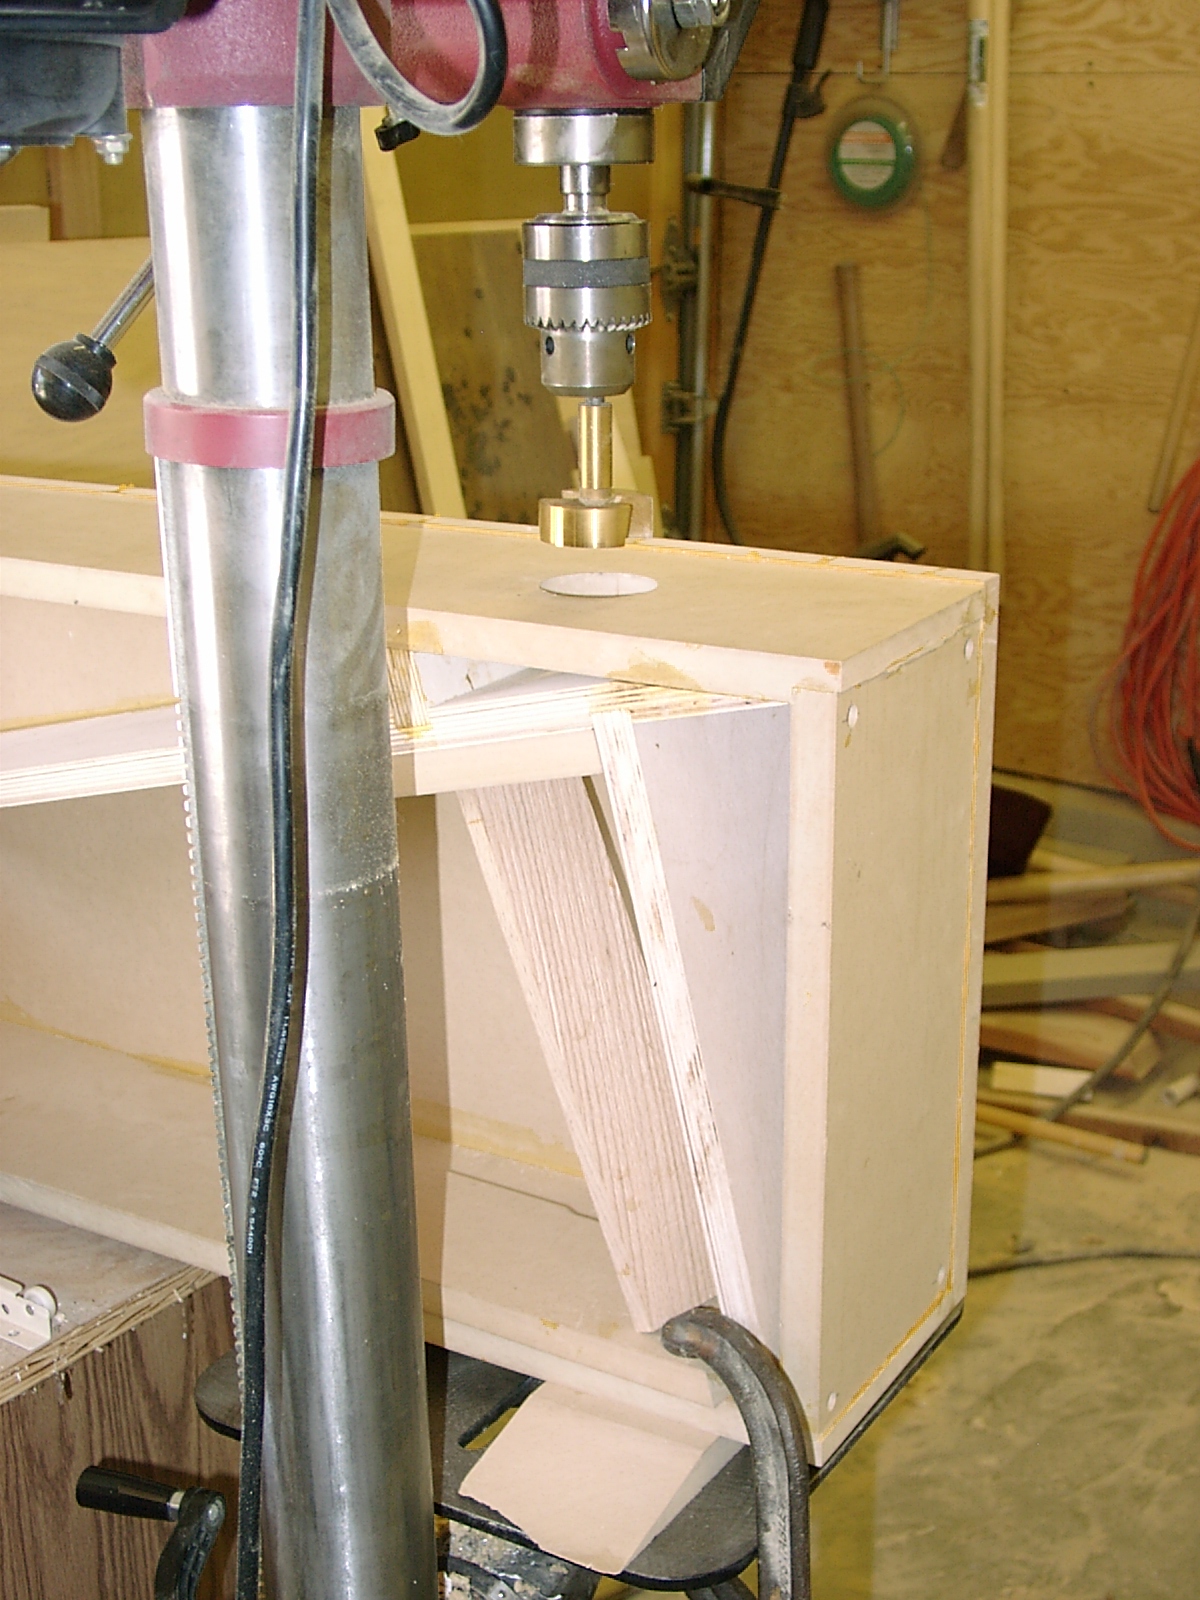
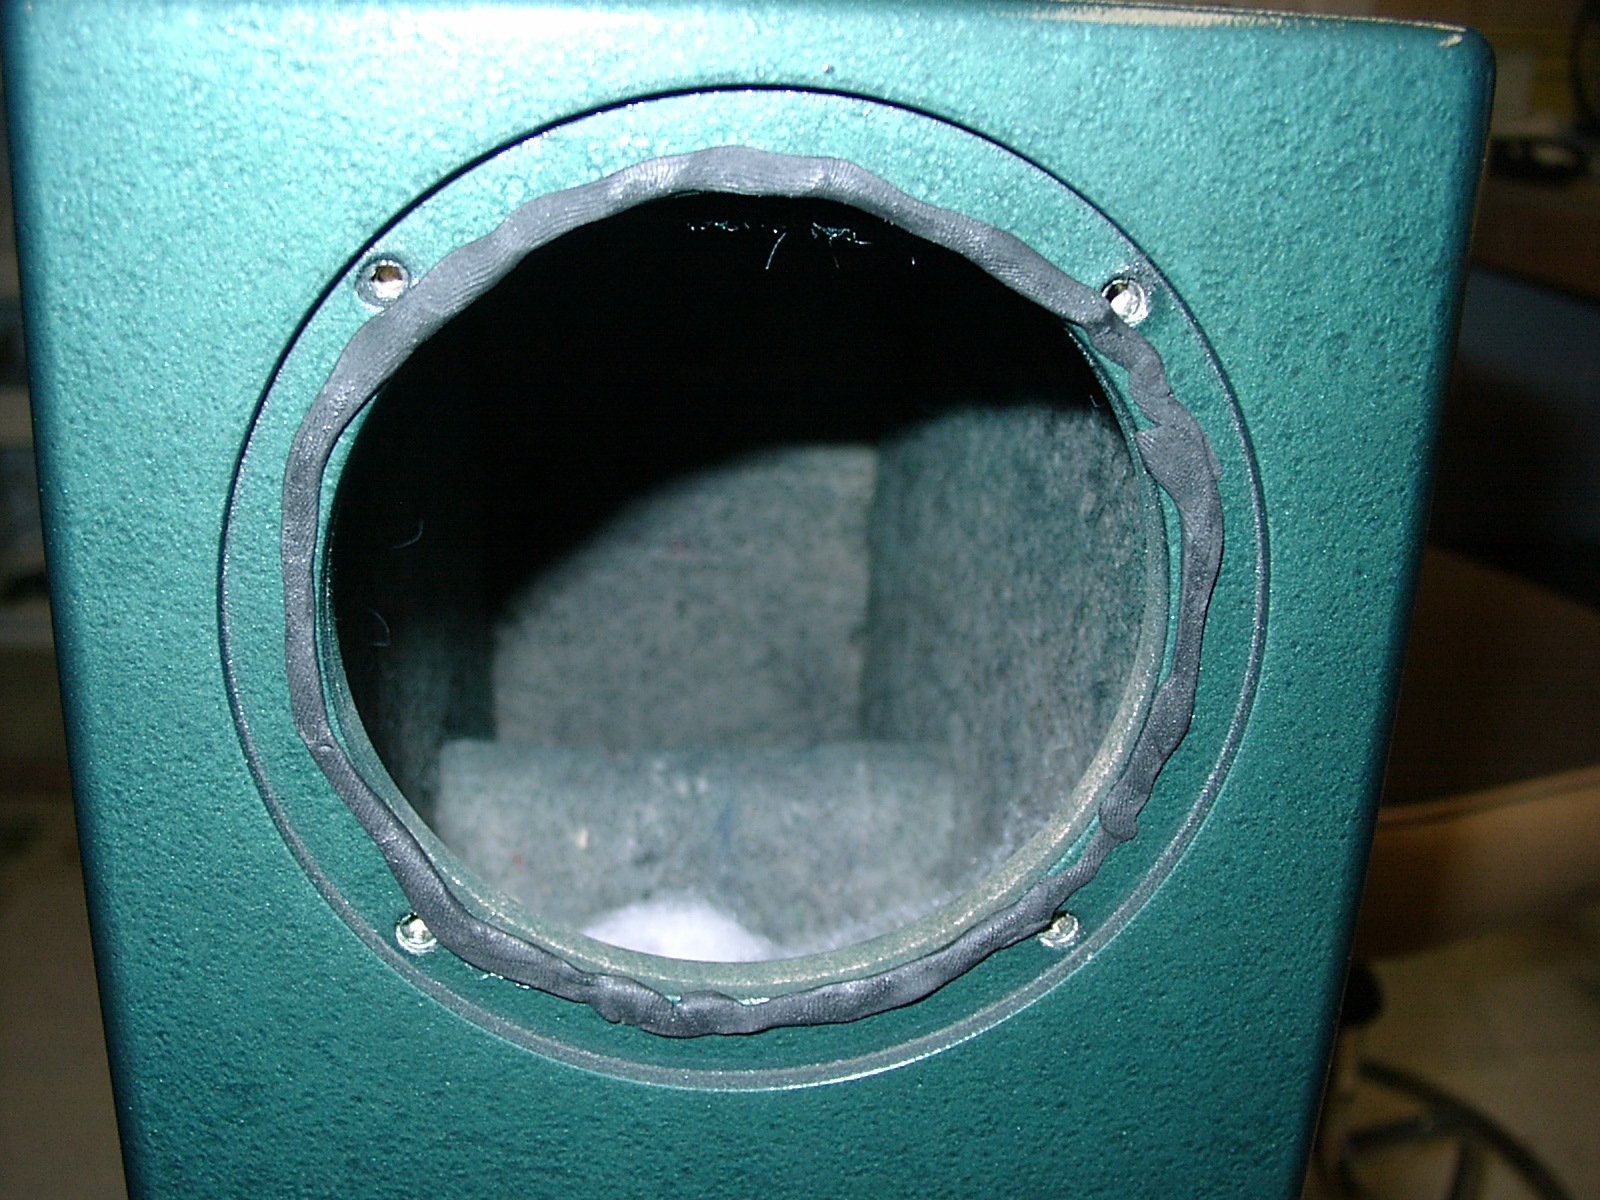
The port should be test-fit at this point, as it may be tough to tweak once the box is closed. But don;t permanently install it until you finish (paint or veneer) the box.
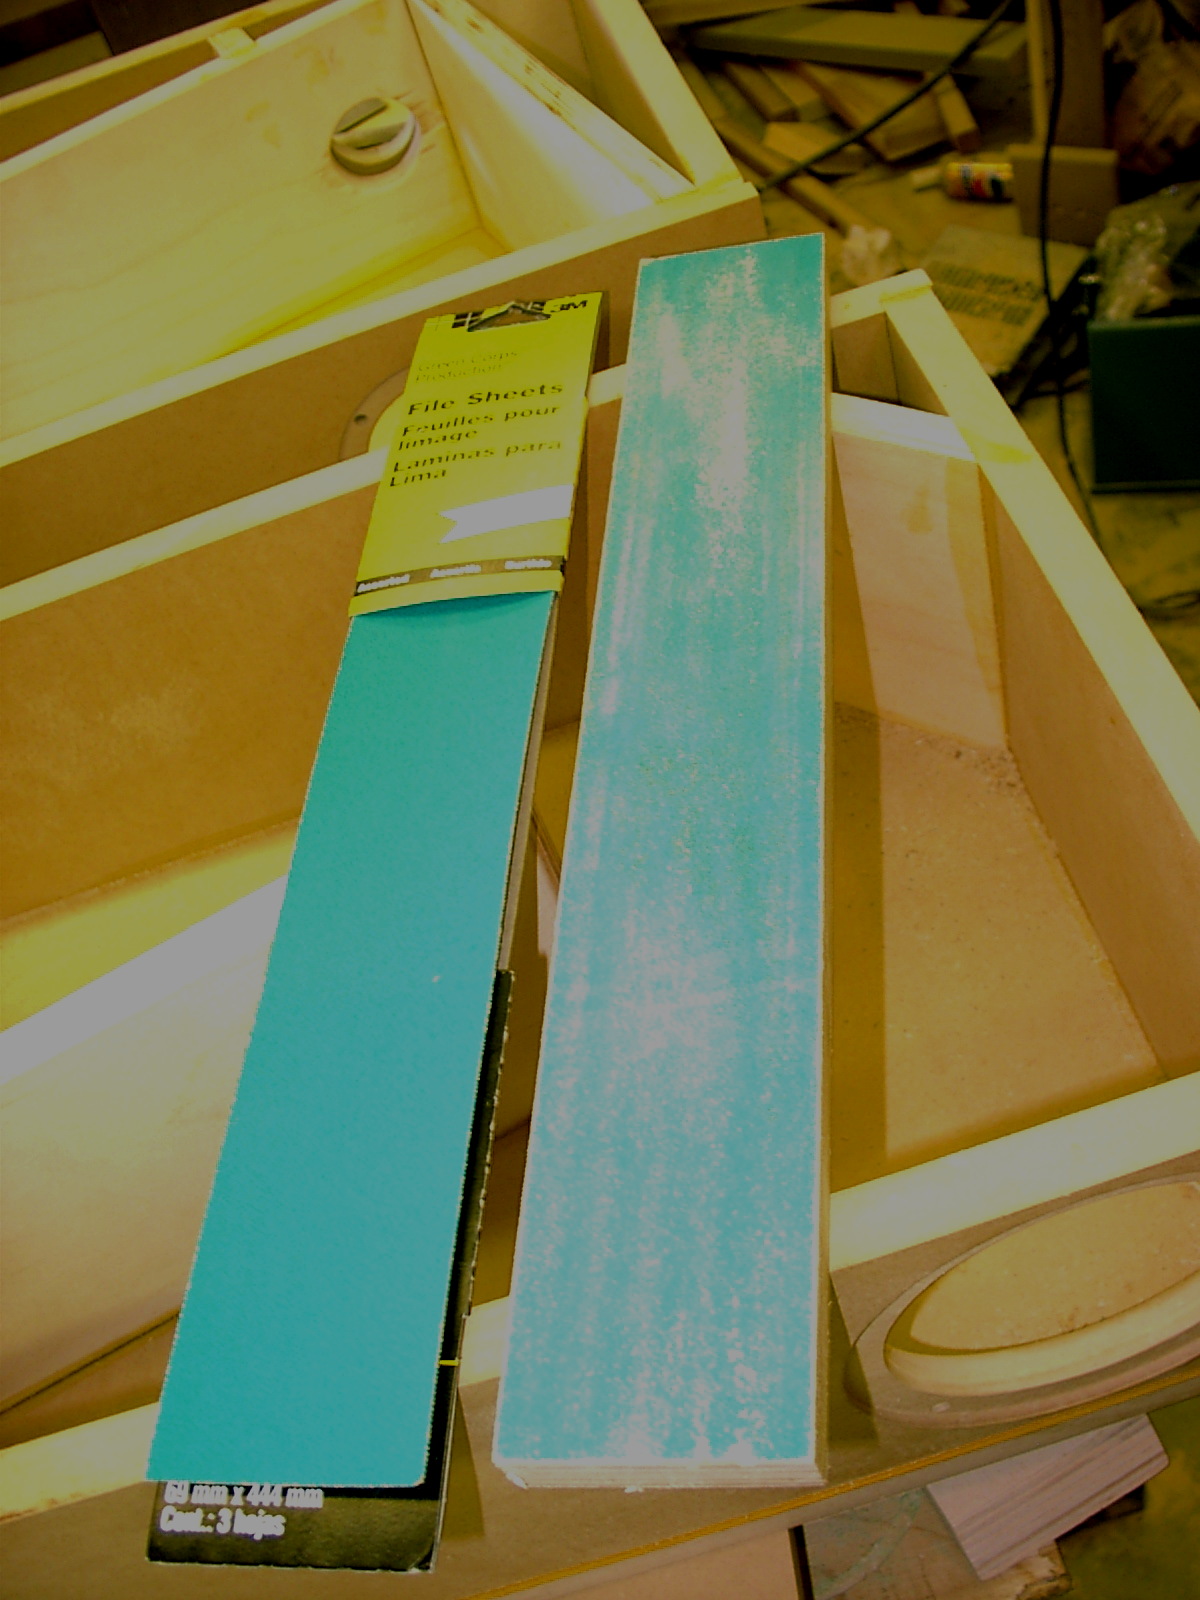
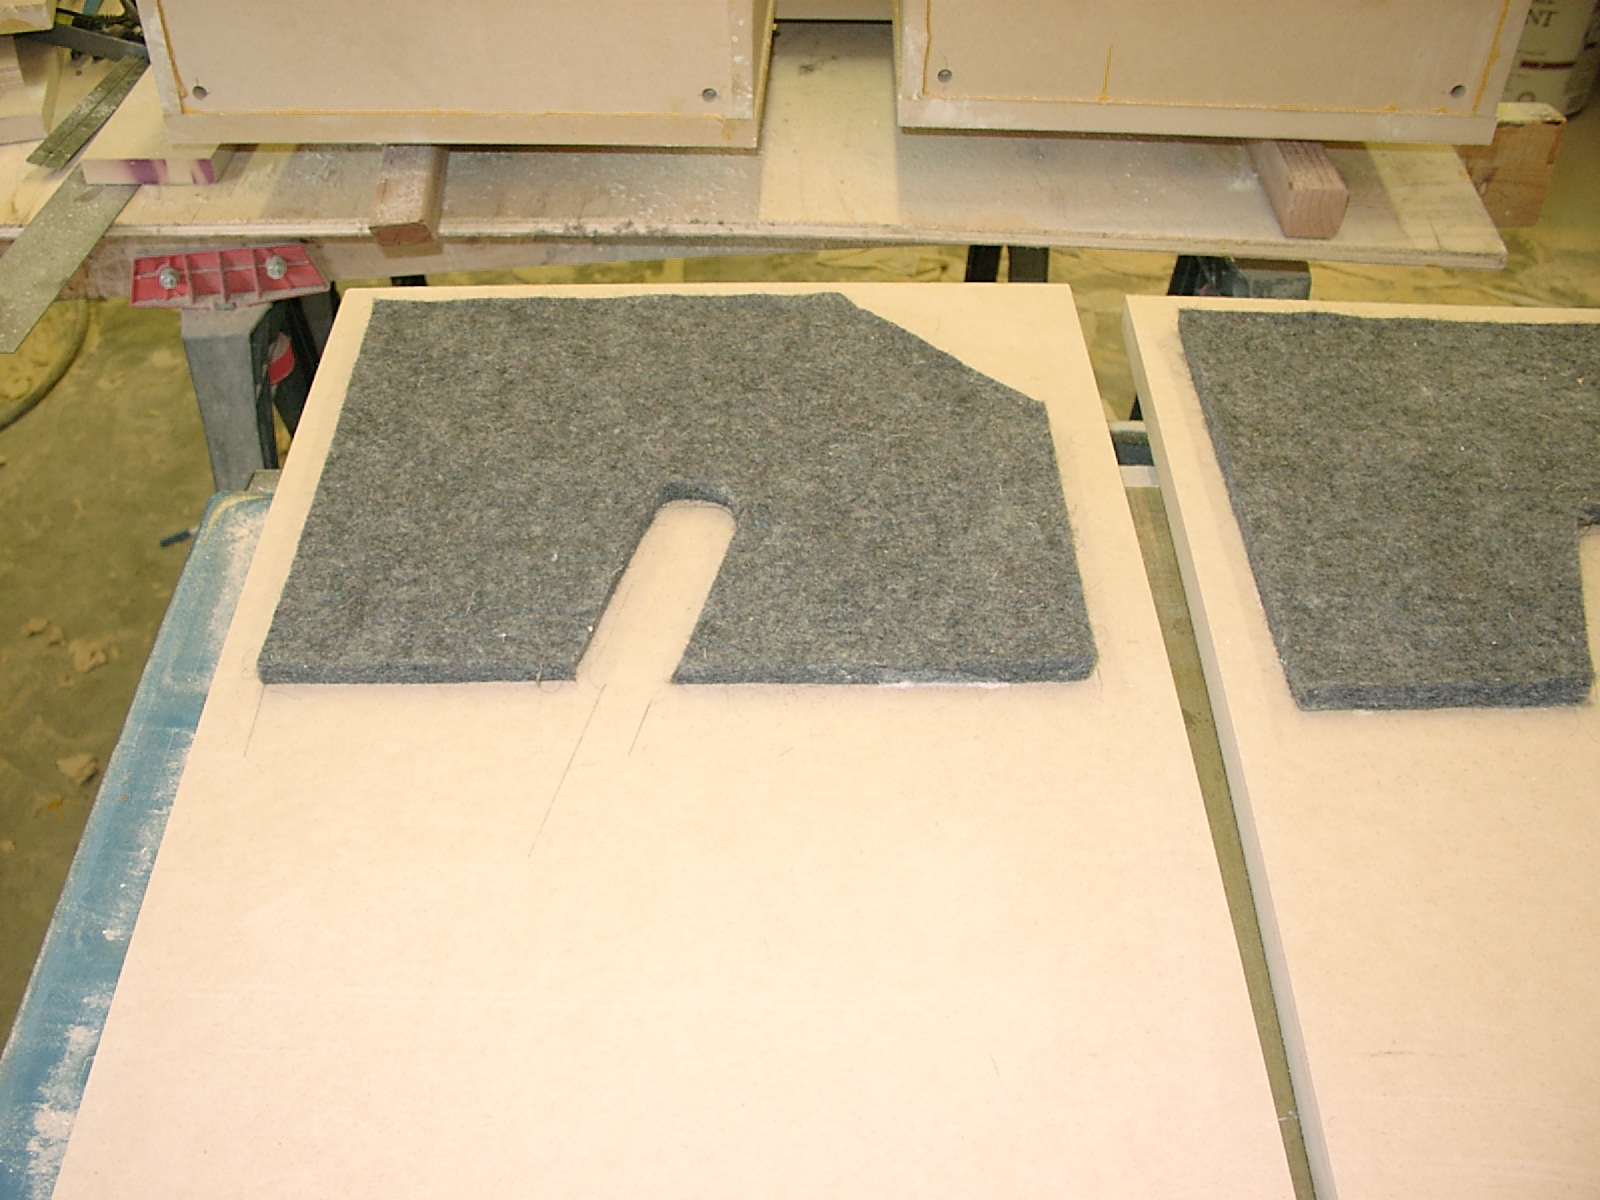
Next, all the internal felt pieces need to be fit. I used 3/8" F-13 gray wool felt from McMaster-Carr. I use "Liquid Nails" adhesive (from Home Depot) to glue the felt in.
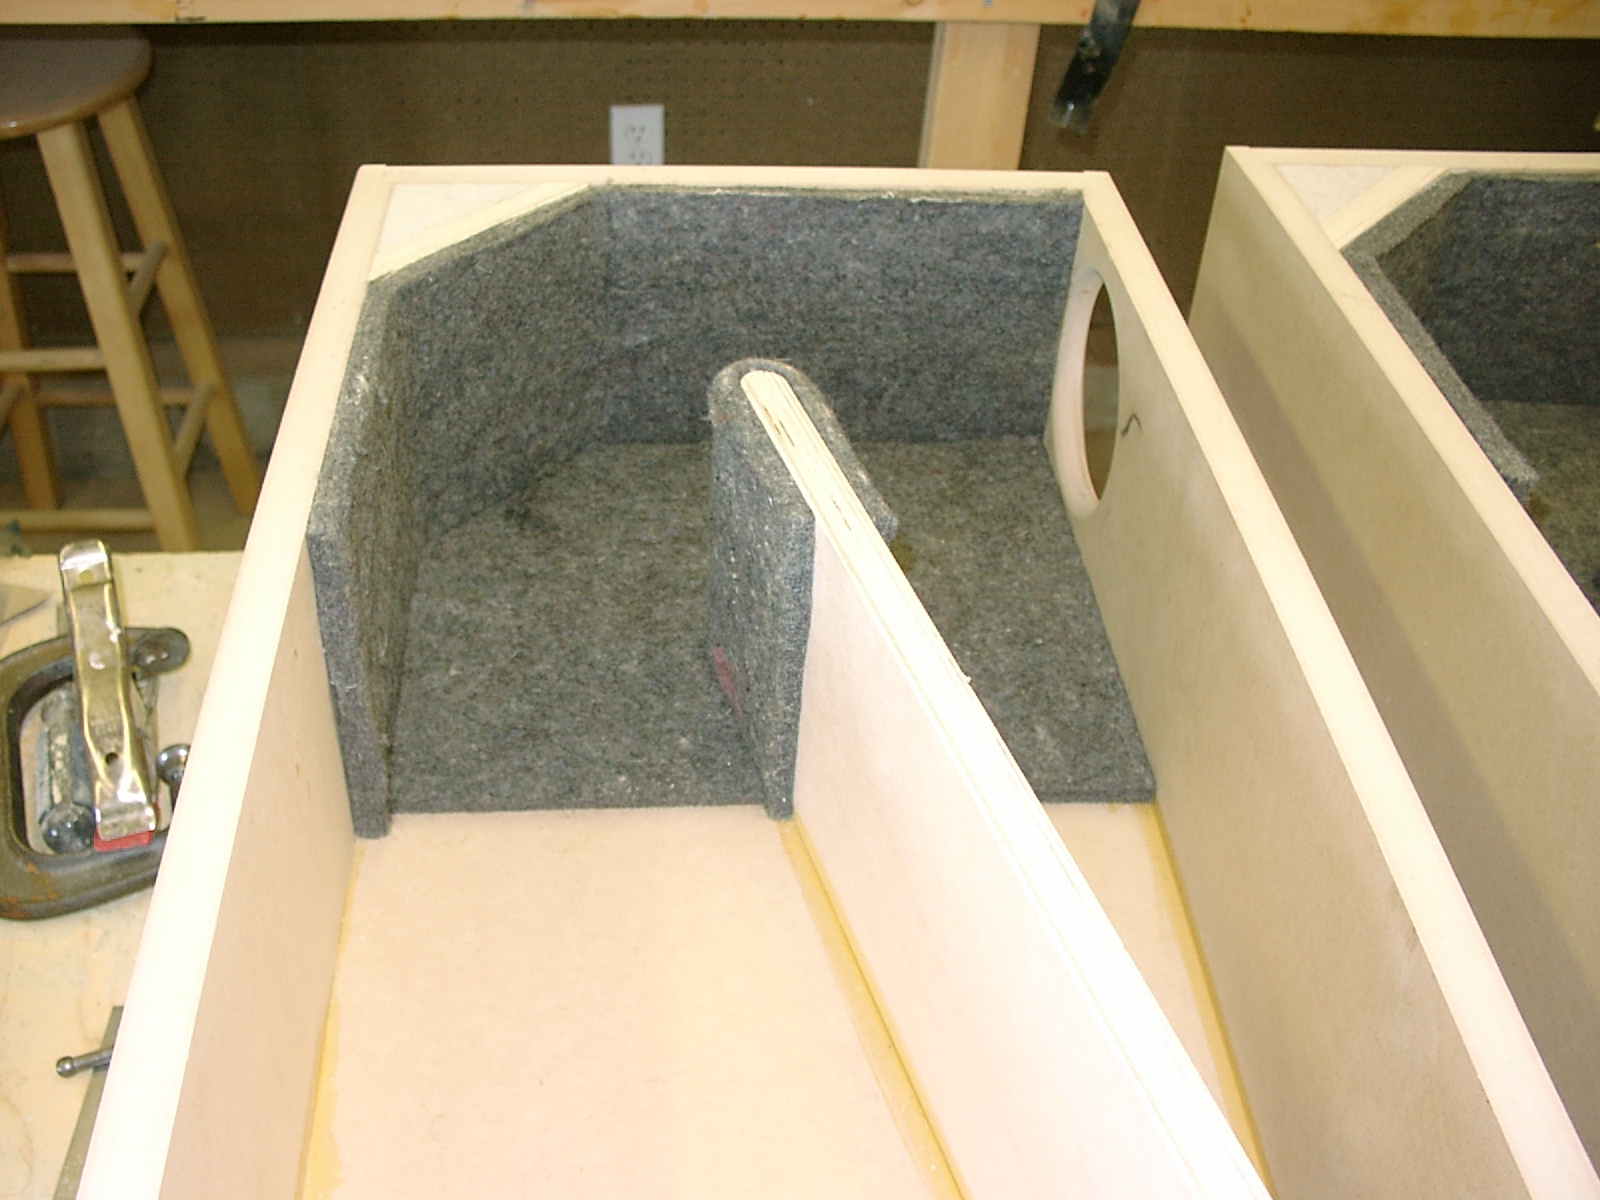
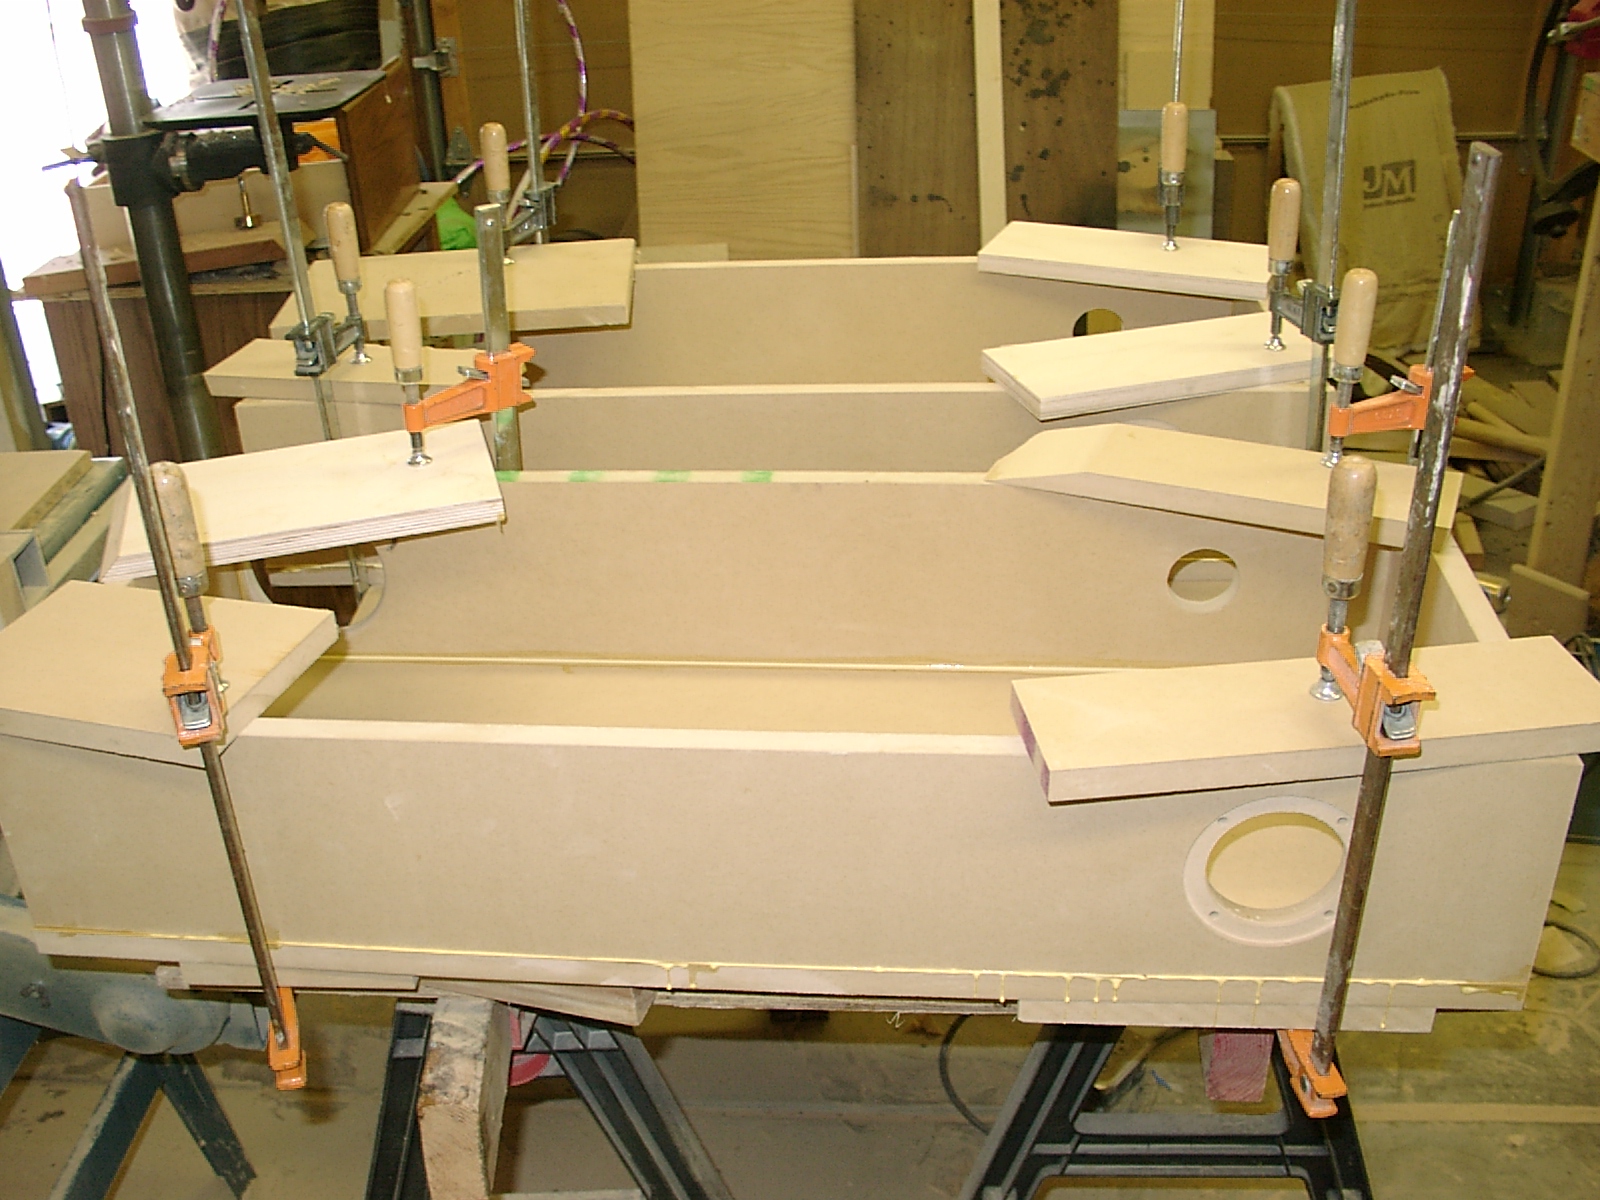
Now the sand has to be put into the "dead" spaces... I used fine white sand, the type used for sandblasting.
Here's what it looks like before you close it up. Note the sand in the bottom and top, and the felt is all in place.
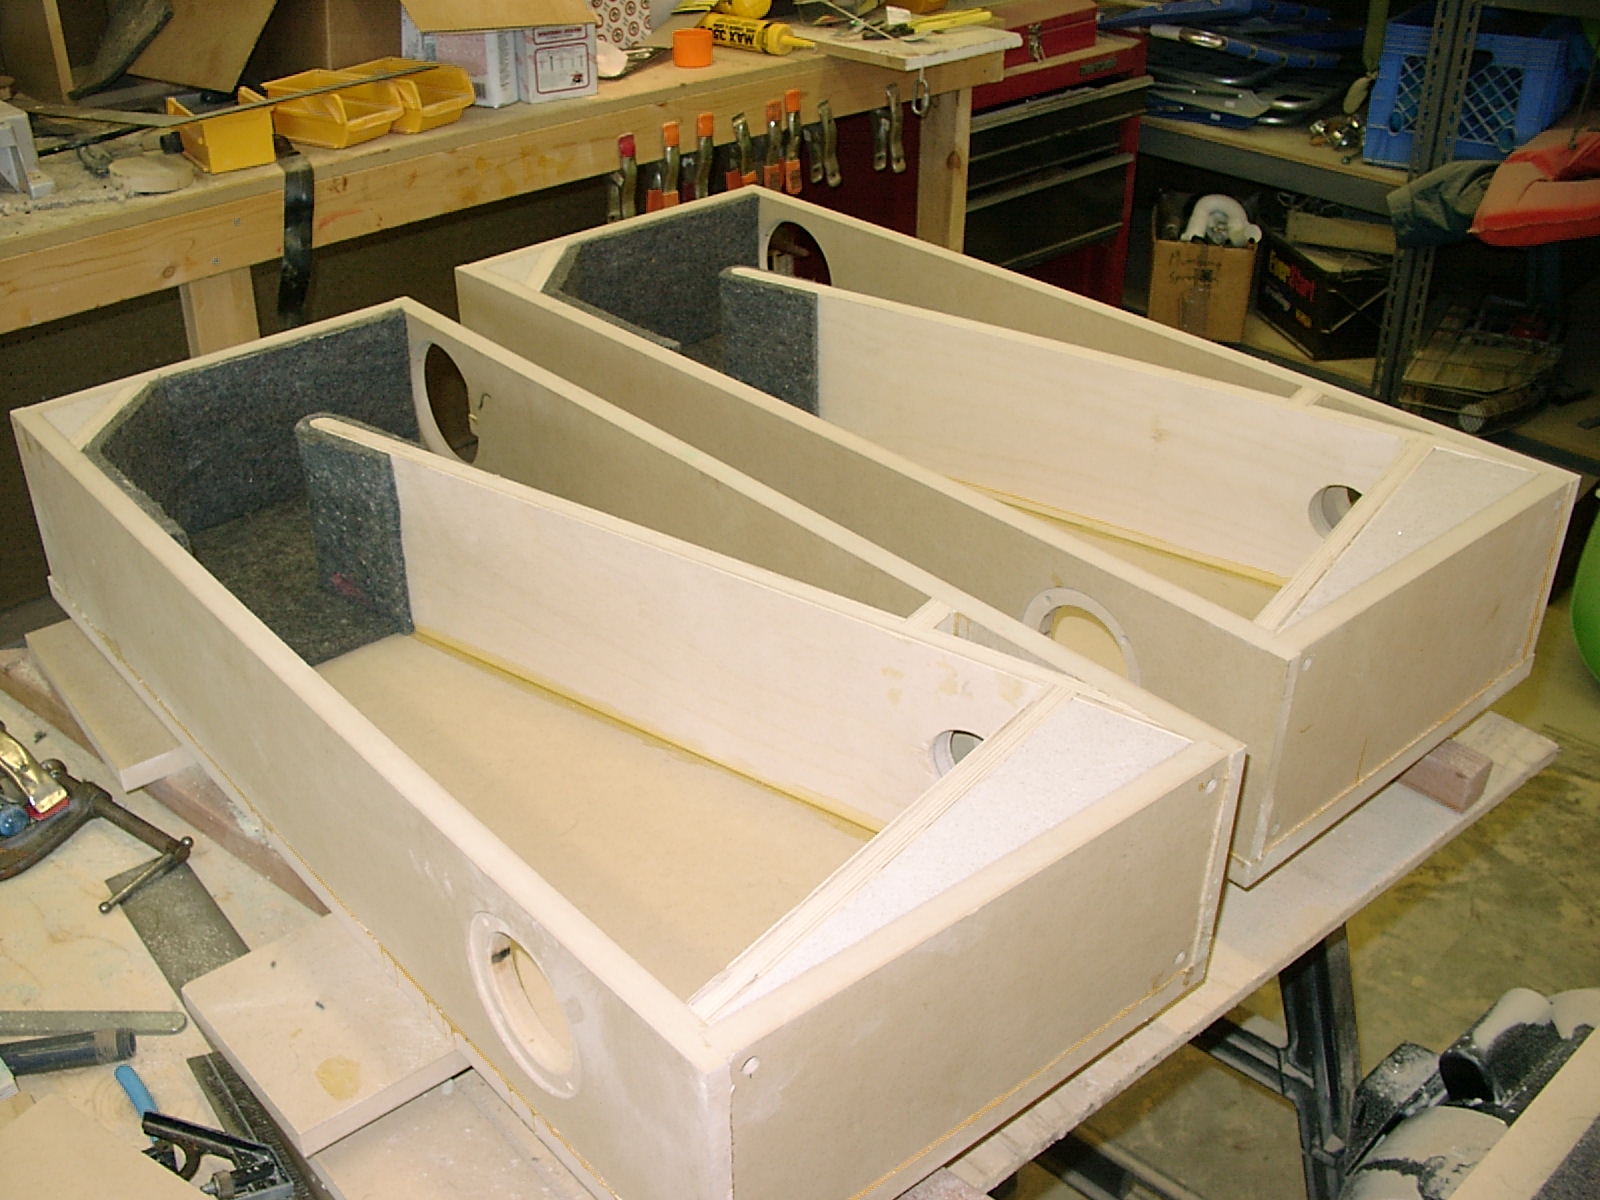
Finally, the other side is glued on:
After the glue is dry, I used a router and sandpaper to clean the box up, and painted it. I usually use a shellac sealer (lots of it) ion the MDF before painting. Being too lazy to do veneer work, I used Green "Hammerite" paint.
Once the paint is dry, you need to install the stuffing as shown in the drawing above, then the driver and the input terminals and wiring. The driver should be gasketed - I used some gooey stuff I had sitting around that I got from one of the speaker companies.
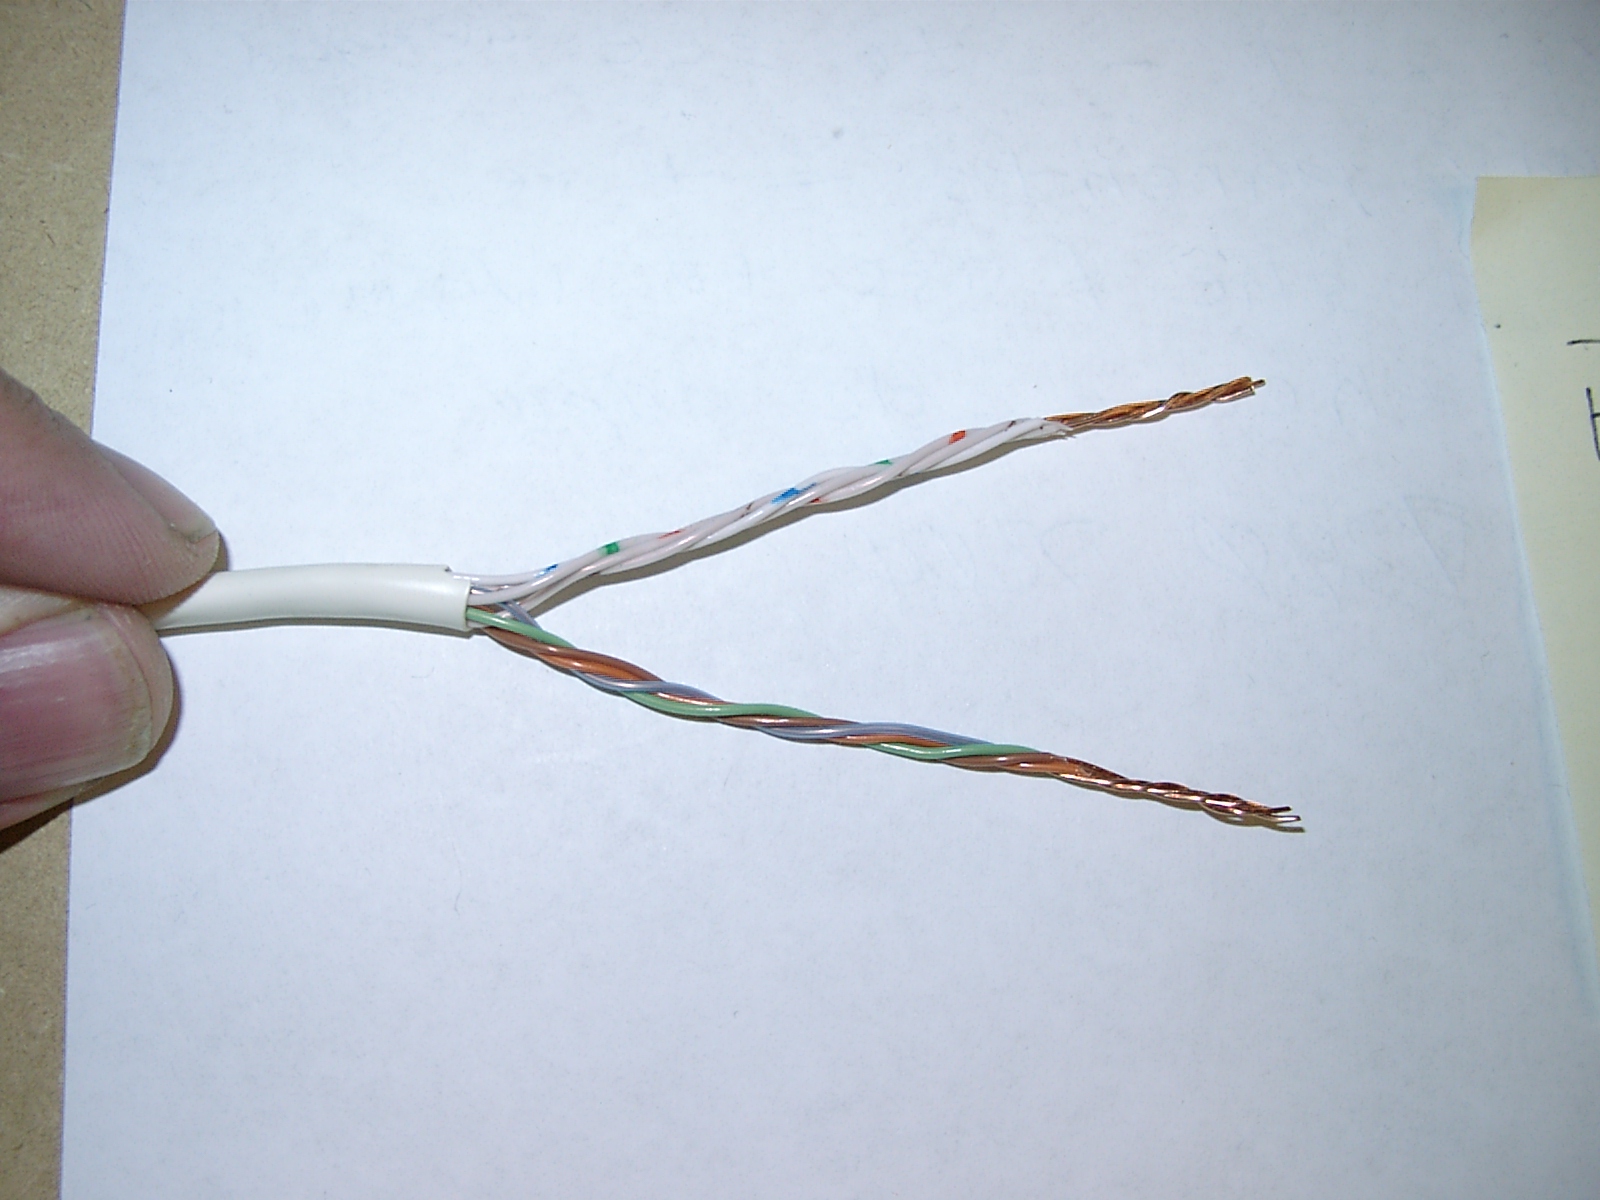
For the internal wiring, I used some CAT5 Ethernet cable. You split each of the pairs and connect one wire of each pair together, lik this:
And you're done!